Blog Layout

The Best CA Glue I’ve Used!

Donald Matthews • Oct 10, 2021

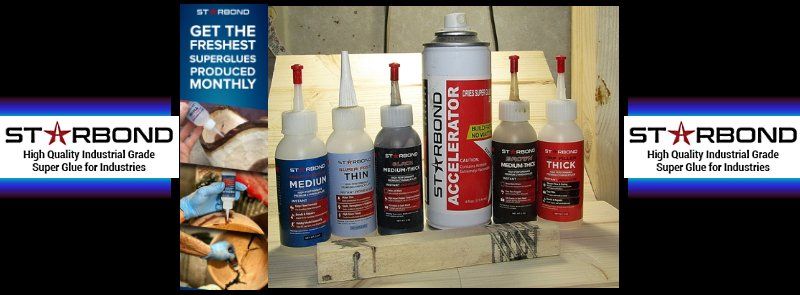
Strarbond Adhesives produce the best super glue you can buy.


I’ve been making some Celtic knot pens as of late. And was just about to finish preparing a batch of pen blanks when I decided I’d take the time to spread the word about the great Cyanoacrylate glue that I’ve been given the opportunity to promote. Starbond contacted me awhile back and offered to send me some of their Superglue and accelerator to try and possibly promote if I liked using it. Well, obviously I like it. The first thing I used it for was to glue the tubes into some pen blanks. I was a bit nervous because every C.A. glue I’d tried to use for this had failed while turning the pen. This can ruin your blank and your tube. At best create extra work and at worst ruin both the blank and the tube.

Starbond  was the exception I’d been looking for! I really wanted an option that allowed me to start turning pens fairly soon after glueing in the tubes. I used Starbond Thick super glue to glue in the tubes for several pens. And turned most of them on the same day. My back failed me, not the Cyanoacrylate. Which amazed me because all other CA glues failed on the first or second pen. Starbond Thick Superglue held on all and held strong. I also used it to finish those pens.

Now CA glue finish on pens can be done with most any superglue. However, not every Cyanoacrylate will achieve the same result. Sometimes there may be a bit of cloudiness. This can come from many things, including the brand of glue. Some super glues don’t take the sanding and polishing as well as others. Sometimes the reaction between the accelerator and the ca causes it. None of these were an issue with the Starbond superglues . The finish sanded and polished to a crystal clear finish with a beautiful shine.

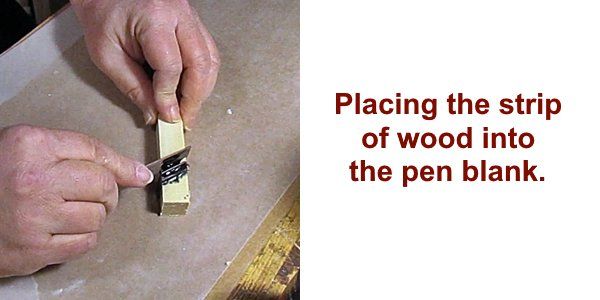
And finally to the Celtic knot pen blanks I mentioned in the beginning. The trick with a Celtic knot is keeping your cuts and glue ups as square as possible. This helps insure you get a straight bore through the center of the blank, which is very important to having a even and nice looking knot. On the one in the pictures, I’m attempting to make a more complex, multi-knot effect.

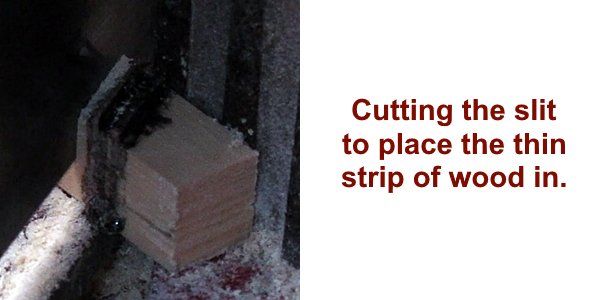
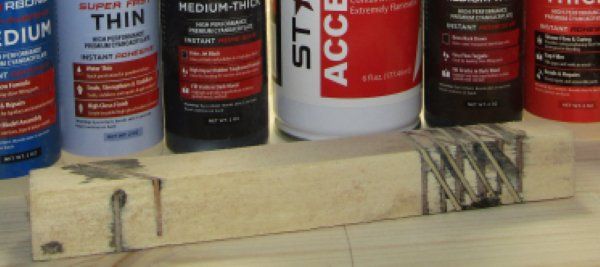
I start by cutting a slit, most of the way through the blank, but not all the way through it. Not cutting completely through the blank aids in the gluing in of the thin pieces of wood. Gluing up a pen blank can be difficult with a straight cut. Gluing up one with an angled cut like these cuts will pull out bad words you didn’t even think you knew while creating new ones.

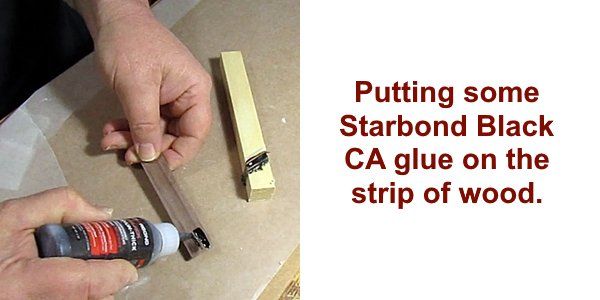
Then I glue the thin pieces of wood into the slit I’ve cut on the blank. I used one of Starbond's tinted CA glues for this. They have these in brown and black. I chose black to try and highlight the brown wood I was using. I put a little bit on each side of the thin cut wood and pushed it down into the slit I had cut previously. Then I spray it with some accelerator and give it just a few minutes to dry. Then I take it back to the saw and cut another slit just below the one I just did. I continue this until I get 4 strips of wood superglued in. Then I flip it over and continue the same process on all sides. 

I haven’t turned that one yet, but here’s the result from a previous pen in which I only did two opposing sides with the multiple cuts and one cut on the other two sides. I highly recommend you give Starbond Super Glue  a try. And if you use the word code “WOODSHOP” , you get a 10% discount on your order.


  • Slide title

    Cutting the slit to place the thin strip of wood in.

    Button
  • Slide title

    Putting some Starbond Black CA glue on the strip of wood.


    Button
  • Slide title

    Placing the strip of wood into the pen blank.

    Button
  • Slide title

    The finished Celtic Knot pen blank.

    Button

Redneck Know How Blog

HYCHIKA Cordless Electric Screwdriver Review
By Donald Matthews 19 Jun, 2022
Will the HYCHIKA cordless screwdriver help me get the screws screwed when my arthritis is acting up? Sometimes it's painful to keep twisting a manual screwdriver and hopefully this is the solution. Come see how things turned out.
Grass Trimmer Review
By Donald Matthews 15 Jun, 2022
I was asked by Hyper Echo to try out their 20 volt cordless string trimmer and edger and do a review on it it. I did and in this article I will let you know what I found out.
The best crappie catching tips you can get!
By Donald Matthews 03 Jun, 2022
Every fisherman has his or her own favorite techniques to catch this beloved fish. Why is crappie, (or pomoxis, if you want to get scientific), are so beloved? Well, they give one heck of a fight when caught. A 2 lb. crappie can put up a fight to rival a bass of larger size. So catching them is fun. There is also the taste factor. Fried crappie tastes great.
Let's fry up some crappie cakes!
By Donald Matthews 03 Jun, 2022
The weather is warm and folks are crappie fishing. Here’s a fried crappie cake recipe that I enjoy. You can eat them plain with some fried taters, or slide them in a bun with some tarter sauce.
SORAKO 800-3000SPM Jigsaw With Blades & Scale Ruler
By Donald Matthews 28 May, 2022
I was asked to review the .SORAKO 800-3000SPM Jigsaw And after the pleasant experience with the SORAKO chainsaw, I was happy to give their jigsaw a try. Come find out what the results were.
By Donald Matthews 11 Apr, 2022
I was given the opportunity by HYCHIKA to try out and review their SORAKO chainsaw. This blog describes what I think about the chainsaw. How well I like it as well as my experience in using it.
Hychika Cordless Drill Tool Review
By Donald Matthews 28 Mar, 2022
I was aske to review the Hychika cordless power drill and I did. I used it to do various things in my home and in my wood shop. This is what I think of it.
By Donald Matthews 11 Oct, 2021
Everybody seems to be in love with dovetails these days. Myself included. They look nice, feel nice, and they make the woodworker feel an overwhelming since of pride when he makes tight and even. Especially the hand cut dovetails. Dovetail joints can be produced with power tools. And there are dovetail jigs you can buy and make. It makes getting precise dovetails with no gaps a lot easier. But nothing feels more satisfying than finally getting hand cut dovetails tight and gap free. And for the record, I use the term, “gap free”, very loosely. I’d wager that even the best woodworker gets gaps in their dovetails no matter how hard they try. Maybe not as many as us new to middlin’ woodworkers, and certainly not as noticeable, but there are gaps in their dovetails. Nowadays, people use dovetails not only as a joint, but as decoration. A showpiece if you will to show off the craftsmanship of the woodworker. But the reality is that they were not originally meant to be pretty. They were utilized to hold pieces that were heavily used together. Such as drawers or other parts of furniture and other items that were constantly pulled or tugged on. In the example below, you can see how the angles of the dovetails will keep the joint from coming apart during the tugging of the drawer when opening it. This part of the joint is where the dovetail joint get’s it’s name. Often when used on boxes, the orientation of those angles are switched around, placing them on the front of the box as a decoration, and the pins of the joint is put on the side. Great for looks, not so great for function. Of course for most smaller boxes, the function of the dovetail really isn’t needed and using dovetails for looks is fine and an anesthetically pleasing way to show off craftsmanship. But let’s not give up on using the dovetail joint for utilitarian purposes when building boxes too quickly. They can be a great way to join a bottom to a box that will be holding heavier stuff, such as tool boxes. The angle of the dovetails can manage the stresses of carrying heavier items such as tools if you wish to maintain a *NO screws or nails* policy on your woodworking projects. Or you can use the dovetail joint along with screws for extra protection against the bottom dropping out. So the purpose of the dovetail is a lot more than to just make your woodworking look good. In fact, long ago, they were hidden. Simply a way to join parts and give them the strength to do what the item was meant to do, and be hidden when the drawer was closed. Using the dovetail joint for decoration is a modern thing. Which I have nothing against. I love to show off dovetails I’ve made nearly perfect. Well, in my eyes anyway. Roy Underhill and Paul Sellers would likely just look at them and grin, maybe chuckle at me being so proud of something so far from the skill level they have achieved.
How I plugged the holes in my table top.
By Donald Matthews 20 Aug, 2020
An option for dealing with nail holes and voids in a table top made with pallet wood.
By Donald Matthews 14 Aug, 2020
Now it’s time to mark where the mortises for the dominoes will go. The dominoes will serve two purposes. 1) They will help the boards line up and stay lined up during glue up. 2) They will help add more surface area to make the glued up joint stronger. Once I get the edge of the boards marked for the mortises, I’ll make sure they they all line up. Then I’ll start creating the mortises that I marked. First by removing a large amount of the waste with a drill and a Forstner bit, and then follow behind with a chisel to clean up the mortise. Next was the process of gluing the boards together and creating the table top. This is conceptually easy. However, it being a large glue up, gets complicated in practice easily. So what I did was glue up two boards at a time. Letting those boards dry, then gluing those sections up until I finally finished with a full table top. This takes awhile longer than just gluing everything up at one time, but it’s far easier to get two boards to line up, and stay lined up, than five or six at the same time. And of course, there’s the window of time to get things lined up before the glue starts to set to consider. When you’re doing this alone, the glue’s set time sneaks up on you faster than you think. I didn’t have enough clamps long enough to do this glue up and lacked the funds to buy them. Nor could I afford to buy the materials to build pipe clamps. I did find a video in which Izzy Swan made some wedge clamps out of two by fours. And since I had the materials on hand to make them, those are what I made and used. Check out Izzy Swan’s video at this link. https://www.youtube.com/watch?v=wr6MkXy1nos
More Posts
Share by: