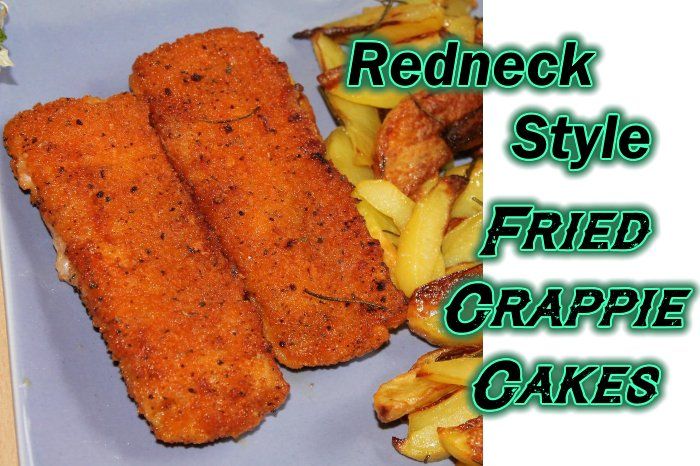
Blog Layout

Fried Crappie Cakes

Donald Matthews • Jun 03, 2022

Delicious Fried Crappie Cakes! Add Some Cole Slaw and Taters and Mmmm...

The weather is warm and folks are crappie fishing. But how do you keep those meals of crappie interesting? Make no mistake, I love the normal filleted crappie and hush puppies. But sometimes you just want to do it a little different. So here’s a fried crappie cake recipe that I enjoy. You can eat them plain with some fried taters, or slide them in a bun with some tarter sauce.


This recipe makes 5 to 6 fried crappie cakes.


The best tasting fried crappie is fried in a cast iron skillet

Ingredients

1 pound of crappie fillets
1 large egg
1/4 cup mayonnaise
1/2 to 1 tbsp. Dijon mustard
2 to 4 drops of liquid smoke
1 tbsp Lemon Juice
1 tsp. soy sauce
1 tsp. salt
1-1/2 cups bread crumbs
1 tbsp. chopped fresh parsley
2 tbsp. butter
2 tbsp. vegetable oil

Click here for
professional
kitchen supplies!


Instructions


Great frying oil for your
fried crappie cakes!

Boil the crappie fillets in a cast-iron skillet. Just boil the fish for a few minutes, the crappie fillets will feel firm. Then, let the fish cool.


Since the crappie fillets are cooling, this is a good time to mix your batter. In a large bowl, whisk the egg, mayonnaise, mustard, liquid smoke, lemon, salt, and soy sauce.


When the crappie fillets have cooled, break them into large chunks. Now mix in the fish, bread crumbs, and parsley into the batter mixture. Be sure to mix it up thoroughly.


When the mixture starts to stick together, form the crappie mixture it into cakes. You want to make them between 1/4-inch and 1/2-inch thick.


Now your crappie cakes are ready to be fried in a skillet. Heat the butter and vegetable oil to frying temp and add your fish cakes. When the first side is brown, flip the crappie cakes over and brown that side. When both sides are brown pull them from the oil. Serve hot and enjoy.


Redneck Know How Blog

HYCHIKA Cordless Electric Screwdriver Review
By Donald Matthews 19 Jun, 2022
Will the HYCHIKA cordless screwdriver help me get the screws screwed when my arthritis is acting up? Sometimes it's painful to keep twisting a manual screwdriver and hopefully this is the solution. Come see how things turned out.
Grass Trimmer Review
By Donald Matthews 15 Jun, 2022
I was asked by Hyper Echo to try out their 20 volt cordless string trimmer and edger and do a review on it it. I did and in this article I will let you know what I found out.
The best crappie catching tips you can get!
By Donald Matthews 03 Jun, 2022
Every fisherman has his or her own favorite techniques to catch this beloved fish. Why is crappie, (or pomoxis, if you want to get scientific), are so beloved? Well, they give one heck of a fight when caught. A 2 lb. crappie can put up a fight to rival a bass of larger size. So catching them is fun. There is also the taste factor. Fried crappie tastes great.
SORAKO 800-3000SPM Jigsaw With Blades & Scale Ruler
By Donald Matthews 28 May, 2022
I was asked to review the .SORAKO 800-3000SPM Jigsaw And after the pleasant experience with the SORAKO chainsaw, I was happy to give their jigsaw a try. Come find out what the results were.
By Donald Matthews 11 Apr, 2022
I was given the opportunity by HYCHIKA to try out and review their SORAKO chainsaw. This blog describes what I think about the chainsaw. How well I like it as well as my experience in using it.
Hychika Cordless Drill Tool Review
By Donald Matthews 28 Mar, 2022
I was aske to review the Hychika cordless power drill and I did. I used it to do various things in my home and in my wood shop. This is what I think of it.
By Donald Matthews 11 Oct, 2021
Everybody seems to be in love with dovetails these days. Myself included. They look nice, feel nice, and they make the woodworker feel an overwhelming since of pride when he makes tight and even. Especially the hand cut dovetails. Dovetail joints can be produced with power tools. And there are dovetail jigs you can buy and make. It makes getting precise dovetails with no gaps a lot easier. But nothing feels more satisfying than finally getting hand cut dovetails tight and gap free. And for the record, I use the term, “gap free”, very loosely. I’d wager that even the best woodworker gets gaps in their dovetails no matter how hard they try. Maybe not as many as us new to middlin’ woodworkers, and certainly not as noticeable, but there are gaps in their dovetails. Nowadays, people use dovetails not only as a joint, but as decoration. A showpiece if you will to show off the craftsmanship of the woodworker. But the reality is that they were not originally meant to be pretty. They were utilized to hold pieces that were heavily used together. Such as drawers or other parts of furniture and other items that were constantly pulled or tugged on. In the example below, you can see how the angles of the dovetails will keep the joint from coming apart during the tugging of the drawer when opening it. This part of the joint is where the dovetail joint get’s it’s name. Often when used on boxes, the orientation of those angles are switched around, placing them on the front of the box as a decoration, and the pins of the joint is put on the side. Great for looks, not so great for function. Of course for most smaller boxes, the function of the dovetail really isn’t needed and using dovetails for looks is fine and an anesthetically pleasing way to show off craftsmanship. But let’s not give up on using the dovetail joint for utilitarian purposes when building boxes too quickly. They can be a great way to join a bottom to a box that will be holding heavier stuff, such as tool boxes. The angle of the dovetails can manage the stresses of carrying heavier items such as tools if you wish to maintain a *NO screws or nails* policy on your woodworking projects. Or you can use the dovetail joint along with screws for extra protection against the bottom dropping out. So the purpose of the dovetail is a lot more than to just make your woodworking look good. In fact, long ago, they were hidden. Simply a way to join parts and give them the strength to do what the item was meant to do, and be hidden when the drawer was closed. Using the dovetail joint for decoration is a modern thing. Which I have nothing against. I love to show off dovetails I’ve made nearly perfect. Well, in my eyes anyway. Roy Underhill and Paul Sellers would likely just look at them and grin, maybe chuckle at me being so proud of something so far from the skill level they have achieved.
Best super glue ever!
By Donald Matthews 10 Oct, 2021
My wonderful experience with Starbond Super glue is explained in this blog post. The absolute best CA glue I've used.
How I plugged the holes in my table top.
By Donald Matthews 20 Aug, 2020
An option for dealing with nail holes and voids in a table top made with pallet wood.
By Donald Matthews 14 Aug, 2020
Now it’s time to mark where the mortises for the dominoes will go. The dominoes will serve two purposes. 1) They will help the boards line up and stay lined up during glue up. 2) They will help add more surface area to make the glued up joint stronger. Once I get the edge of the boards marked for the mortises, I’ll make sure they they all line up. Then I’ll start creating the mortises that I marked. First by removing a large amount of the waste with a drill and a Forstner bit, and then follow behind with a chisel to clean up the mortise. Next was the process of gluing the boards together and creating the table top. This is conceptually easy. However, it being a large glue up, gets complicated in practice easily. So what I did was glue up two boards at a time. Letting those boards dry, then gluing those sections up until I finally finished with a full table top. This takes awhile longer than just gluing everything up at one time, but it’s far easier to get two boards to line up, and stay lined up, than five or six at the same time. And of course, there’s the window of time to get things lined up before the glue starts to set to consider. When you’re doing this alone, the glue’s set time sneaks up on you faster than you think. I didn’t have enough clamps long enough to do this glue up and lacked the funds to buy them. Nor could I afford to buy the materials to build pipe clamps. I did find a video in which Izzy Swan made some wedge clamps out of two by fours. And since I had the materials on hand to make them, those are what I made and used. Check out Izzy Swan’s video at this link. https://www.youtube.com/watch?v=wr6MkXy1nos
More Posts
Share by: