Blog Layout

SORAKO Jigsaw Tool Review

Donald Matthews • May 28, 2022

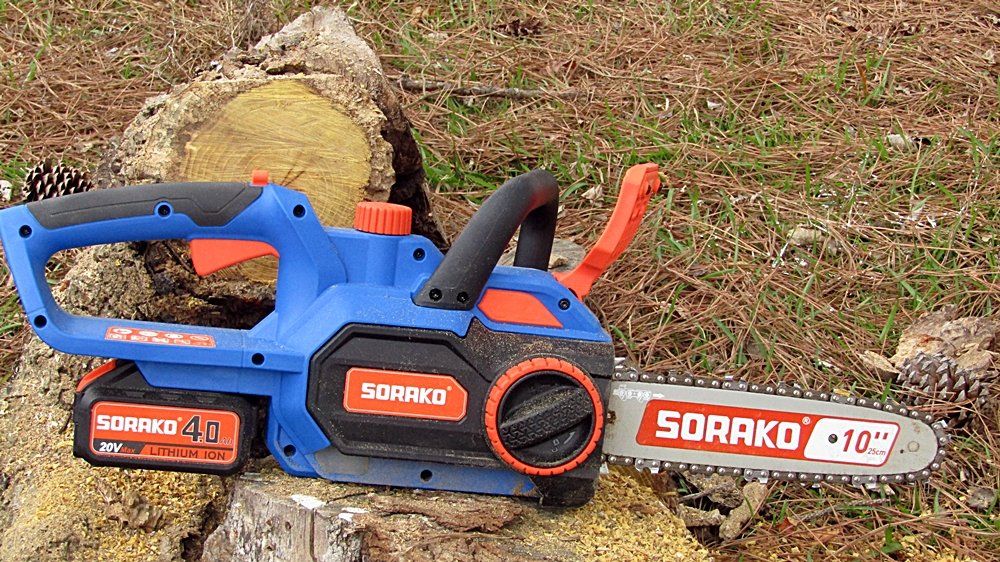
I was asked to review another SORAKO tool. And after the pleasant experience with the SORAKO chainsaw, I was happy to give their jigsaw a try.


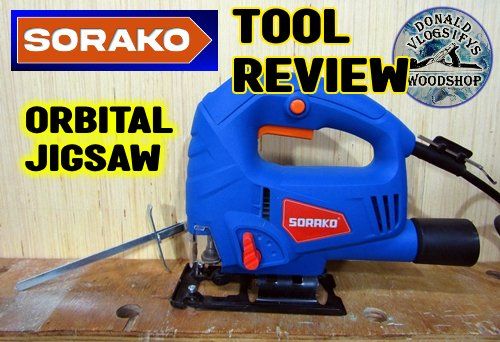
The SORAKO 800-3000SPM Jigsaw with orbital function.

The SORAKO 800-3000SPM Jigsaw With Blades & Scale Ruler came to the shop. And I was eager to use open it and read the instructions so I could plug it in and try it out. It comes with wood and metal T-shank blades, a straight cut fence (aka... scale ruler), and Allen wrench (Hex key). It also comes with a safety shield that attaches just in front of the blade mechanism and prevents debris from flying up and causing injury. Along with that, it comes with some other cool features.

SORAKO Orbital Jigsaw
Motor 5.0Amp
600watt
6 Variable Speeds
(variable speed control dial with 800 to 3100 SPM)
1 to 4 - plastic, PVC
2 to 3 - steel plate
3 to 4 - stainless steel
3 to 6 - aluminum
5 to 6 - wood
4 Position Orbital
cutting settings
Position 0 - straight cut
Position 1 - mild orbital cut
Position 2 - medium orbital cut
Position 3 - aggressive orbital cut
Other Features Bevel cutting: ±45°
Max Cutting Depth 60mm for Wood
Tool free blade change
Blade lock for safety
Integrated dust blower
Dust removal system

The SORAKO jigsaw has an easy to adjust Obital setting.


The SORAKO jigsaw toolless blade change system.


Cutting out a hole with the SORAKO jigsaw.


There is a noticable difference between the
scrolling jigsaw blade and a standard wood cutting jigsaw blade.

I wanted to use the jigsaw on some scrap first to get a feel for some of the features on it. Mainly the oscillating feature. I have apparently been living under a rock, because this was new to me. But they have been around for awhile. This feature can be handy, but also can cause some problems if used for the wrong cutting task. What it does is pull the blade back, away from the cut on the non-cutting stroke. This allows the chips to clear and makes a for a faster cut. The down side of this is that it creates more tear out along the cut. There are 3 settings for the orbital cut besides the 0 setting, which is straight up and down. 1 being the mildest oscillation and 3 being the most aggressive. I tried all 3 while cutting a hole. All 3 worked, however, I got a cleaner cut from setting it to 0.

I can see the appeal of using the more aggressive oscillating setting in construction or when speed is needed and you don’t mind a little tear out. But if you want the clean, sharp cuts, it’s best to avoid it. And in situations where you’ll be cutting out a circle as I did, or around curves, it tended to cause me to over cut with more tear out than I cared for. The jigsaw itself performed wonderfully. Once I set the oscillation to 0, it cut the circle in a good amount of time and gave me a very accurate and quality hole.

I then went on to try the scrolling blade they had sent with the SORAKO jigsaw for me to try. This jigsaw blade for scrolling is noticeably shorter and thinner than the other blades. I’m not so great at making scrollsaw patterns so I went to my friend’s website, SimplyWoodenCreations.com, and grabbed one of his. He also has a YouTube channel by the same name and does a live show almost every Saturday at 8pm Eastern time. I chose a scrollsaw pattern that says something I say all the time. You see, I screw up and do stoopid things in my shop quite often. And you just can’t fix stoopid. So I printed out the pattern and used some adhesive spay to attach it to a piece of Luan plywood. Then drilled some holes to put my blade into and began cutting.


Using the SORAKO jigsaw as a scrollsaw.


The finished scrolling project I did with the
SORAKO jigsaw.


I made sure the SORAKO jigsaw was speed was set to a slower speed. Normally for cutting wood I’d set it somewhere between 4 and 6. But I found that slowing the speed down to 3 worked best for doing the scroll work on the 1/4“ Luan. I tried to make use of the holes I’d drilled for making sharp turns, but in some places I had to put the old skill of cutting, backing up, cutting, and sort of whittling away enough material until I could make that turn. It’s just something you have to practice to get good at. The SORAKO 800-3000SPM jigsaw did a fine job of it. And cut surprisingly clean. Making precise cuts for scroll work is a lot to ask from a jigsaw, but I was very pleased with it. Please note, I am a long way from being a scrollsaw artist.

The next thing I tried it on was cutting through metal. From time to time I do work with pallet wood and need to cut through nails and sometimes screws. I drove some sinker nails in the end of a 2x4. I also drove a yellow zinc screw into it, just to see what it would do. It cut through the 10 penny nails like they were butter. Then I got to that yellow zinc screw, which is harder. It did not want to be cut. I pushed on it and worked it, but the saw simply would not cut it. It finally worked through enough that I could whack it off with a hammer. But it never really got through it. I believe it has something to do with the strength of the yellow zinc screw and how it’s made. I checked the blade I was using after it had cooled down enough to touch it and it was still sharp. I don’t work with metal much, so there is a great likelihood that it was just me not knowing what I was doing. I was impressed that the tool held up so well. I was scared I was pushing it too hard and would have burned the motor up.


The SORAKO jigsaw in use
The result of cutting nails with the SORAKO jigsaw

Click here to learn more about the
5.0A, 800-3000SPM Jigsaw With Blades & Scale Ruler


Other than that one screw, the SORAKO 800-3000SPM jigsaw held up well and worked great. It made the precise cuts needed to do the scroll work I did and was heavy duty enough to cut through the 2x4 with nails in it. Please click here to learn more and to purchase the SORAKO 800-3000SPM Jigsaw for yourself. And the video of me doing all that I mentioned is below. Have a lovely day!


Redneck Know How Blog

HYCHIKA Cordless Electric Screwdriver Review
By Donald Matthews 19 Jun, 2022
Will the HYCHIKA cordless screwdriver help me get the screws screwed when my arthritis is acting up? Sometimes it's painful to keep twisting a manual screwdriver and hopefully this is the solution. Come see how things turned out.
Grass Trimmer Review
By Donald Matthews 15 Jun, 2022
I was asked by Hyper Echo to try out their 20 volt cordless string trimmer and edger and do a review on it it. I did and in this article I will let you know what I found out.
The best crappie catching tips you can get!
By Donald Matthews 03 Jun, 2022
Every fisherman has his or her own favorite techniques to catch this beloved fish. Why is crappie, (or pomoxis, if you want to get scientific), are so beloved? Well, they give one heck of a fight when caught. A 2 lb. crappie can put up a fight to rival a bass of larger size. So catching them is fun. There is also the taste factor. Fried crappie tastes great.
Let's fry up some crappie cakes!
By Donald Matthews 03 Jun, 2022
The weather is warm and folks are crappie fishing. Here’s a fried crappie cake recipe that I enjoy. You can eat them plain with some fried taters, or slide them in a bun with some tarter sauce.
By Donald Matthews 11 Apr, 2022
I was given the opportunity by HYCHIKA to try out and review their SORAKO chainsaw. This blog describes what I think about the chainsaw. How well I like it as well as my experience in using it.
Hychika Cordless Drill Tool Review
By Donald Matthews 28 Mar, 2022
I was aske to review the Hychika cordless power drill and I did. I used it to do various things in my home and in my wood shop. This is what I think of it.
By Donald Matthews 11 Oct, 2021
Everybody seems to be in love with dovetails these days. Myself included. They look nice, feel nice, and they make the woodworker feel an overwhelming since of pride when he makes tight and even. Especially the hand cut dovetails. Dovetail joints can be produced with power tools. And there are dovetail jigs you can buy and make. It makes getting precise dovetails with no gaps a lot easier. But nothing feels more satisfying than finally getting hand cut dovetails tight and gap free. And for the record, I use the term, “gap free”, very loosely. I’d wager that even the best woodworker gets gaps in their dovetails no matter how hard they try. Maybe not as many as us new to middlin’ woodworkers, and certainly not as noticeable, but there are gaps in their dovetails. Nowadays, people use dovetails not only as a joint, but as decoration. A showpiece if you will to show off the craftsmanship of the woodworker. But the reality is that they were not originally meant to be pretty. They were utilized to hold pieces that were heavily used together. Such as drawers or other parts of furniture and other items that were constantly pulled or tugged on. In the example below, you can see how the angles of the dovetails will keep the joint from coming apart during the tugging of the drawer when opening it. This part of the joint is where the dovetail joint get’s it’s name. Often when used on boxes, the orientation of those angles are switched around, placing them on the front of the box as a decoration, and the pins of the joint is put on the side. Great for looks, not so great for function. Of course for most smaller boxes, the function of the dovetail really isn’t needed and using dovetails for looks is fine and an anesthetically pleasing way to show off craftsmanship. But let’s not give up on using the dovetail joint for utilitarian purposes when building boxes too quickly. They can be a great way to join a bottom to a box that will be holding heavier stuff, such as tool boxes. The angle of the dovetails can manage the stresses of carrying heavier items such as tools if you wish to maintain a *NO screws or nails* policy on your woodworking projects. Or you can use the dovetail joint along with screws for extra protection against the bottom dropping out. So the purpose of the dovetail is a lot more than to just make your woodworking look good. In fact, long ago, they were hidden. Simply a way to join parts and give them the strength to do what the item was meant to do, and be hidden when the drawer was closed. Using the dovetail joint for decoration is a modern thing. Which I have nothing against. I love to show off dovetails I’ve made nearly perfect. Well, in my eyes anyway. Roy Underhill and Paul Sellers would likely just look at them and grin, maybe chuckle at me being so proud of something so far from the skill level they have achieved.
Best super glue ever!
By Donald Matthews 10 Oct, 2021
My wonderful experience with Starbond Super glue is explained in this blog post. The absolute best CA glue I've used.
How I plugged the holes in my table top.
By Donald Matthews 20 Aug, 2020
An option for dealing with nail holes and voids in a table top made with pallet wood.
By Donald Matthews 14 Aug, 2020
Now it’s time to mark where the mortises for the dominoes will go. The dominoes will serve two purposes. 1) They will help the boards line up and stay lined up during glue up. 2) They will help add more surface area to make the glued up joint stronger. Once I get the edge of the boards marked for the mortises, I’ll make sure they they all line up. Then I’ll start creating the mortises that I marked. First by removing a large amount of the waste with a drill and a Forstner bit, and then follow behind with a chisel to clean up the mortise. Next was the process of gluing the boards together and creating the table top. This is conceptually easy. However, it being a large glue up, gets complicated in practice easily. So what I did was glue up two boards at a time. Letting those boards dry, then gluing those sections up until I finally finished with a full table top. This takes awhile longer than just gluing everything up at one time, but it’s far easier to get two boards to line up, and stay lined up, than five or six at the same time. And of course, there’s the window of time to get things lined up before the glue starts to set to consider. When you’re doing this alone, the glue’s set time sneaks up on you faster than you think. I didn’t have enough clamps long enough to do this glue up and lacked the funds to buy them. Nor could I afford to buy the materials to build pipe clamps. I did find a video in which Izzy Swan made some wedge clamps out of two by fours. And since I had the materials on hand to make them, those are what I made and used. Check out Izzy Swan’s video at this link. https://www.youtube.com/watch?v=wr6MkXy1nos
More Posts
Share by: