Blog Layout

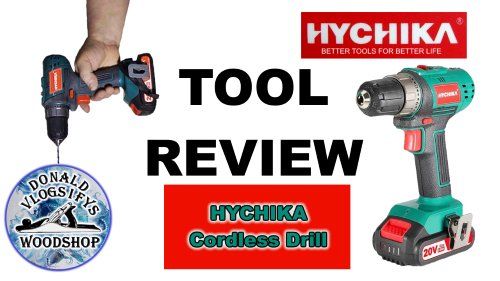
Hychika Cordless Drill Tool Review

Donald Matthews • Mar 28, 2022

This is what I think about the Hychika cordless power drill.

  • Some of the accessories that come with the Hychika cordless drill.

    Hychika Cordless Power Drill Accessories

    Some of the accessories that come with the Hychika cordless drill.

    Button
  • Battery charge indicator let's you know when it's time for a charge.

    Battery Charge Indicator

    Battery charge indicator let's you know when it's time for a charge.

    Button
  • Driving a bolt with the Hychika cordless drill.

    Hychika Cordless Power Drill

    Driving a bolt with the Hychika cordless drill.

    Button
  • Hanging curtains in plaster using the Hychika drill.

    Hychika Cordless Drill.

    Hanging curtains in plaster using the Hychika drill.

    Button
  • Working on a woodworking project using the Hychika cordless drill.

    Hychika Cordless Power Drill

    Working on a woodworking project using the Hychika cordless drill.

    Button

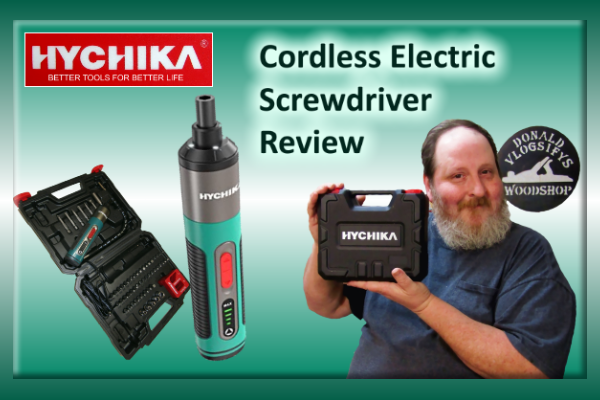
  A few weeks ago Hychika approached me about reviewing one of their tools and gave me the choice of what to review. I chose the cordless power drill. I was very excited when I received it as I was eager to put the drill to work. You know how it is when you get a new tool to use. It’s like being a kid on Christmas day.


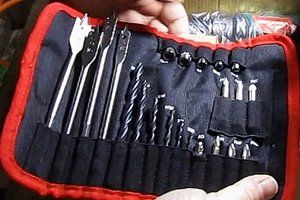
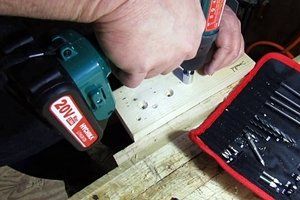
  I was pleased to see that the Hychika cordless drill comes with several accessories.

      They are...

  • 4 Spade bits, 5/8“, 9/16“, 15/32“, and 3/8“
  • 6 Twist bits, 5/16“, 1/4“, 3/16“, 5/32“, 1/8“, and 3/32“
  • 5 Sockets, 5/32“, 3/16“, 1/4“, 9/32“, and 5/16“
  • 7 Driver bits, PZ1, PZ2, PZ2, PH1, PH2, PH2, and an adaptor bit for the sockets. 


  All wrapped in a handy roll-up canvas organizer. There is also a belt clip that is easily installed to the drill, making it easy to just clip on your belt when not in use. And easy to get to when you need it while working.


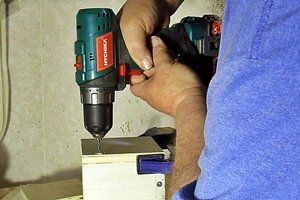
  The drill itself has many great features. Not the least of which is it’s weight and balance. This is important to me because a tool that isn’t comfortable to hold, isn’t comfortable to use. The weight of the Hychika power drill is excellent and gives the perfect amount of weight without being so heavy as to bring on fatigue. And Hychika has managed to distribute that weight in a way that feels balanced in the hand.


  The other features of the Hychika cordless power drill make it an awesome tool for the price.


  • 21 + 1 clutch and variable speed with 2 speeds makes this cordless drill very versatile for home projects as well as in my wood shop. It handles every job I throw at it without issues.
  • 3/8“ metal chuck has a max of 330 in-lb 35 Nm torque. This drill accepts most bits used in a shop and home. It has the strength to handle tough jobs, but the versatility to be delicate enough to install the tiny hinges and latches used on the keepsake and jewelry boxes I make.
  • Reverse for removing screws and backing the bits out of projects when needed.
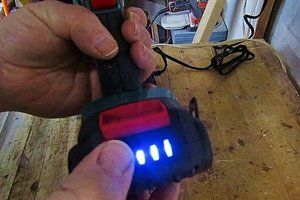
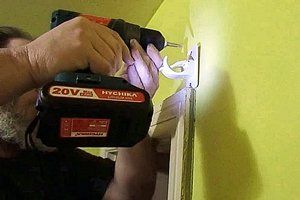
  • Built-in LED light makes low light situations non-situations. No matter how you hold it, the light shines on the work area.
  • 20V Lithium Battery (In the US, 18V in EU) Comes with a 1 hour quick charger so you’re never far from fully charged. This cordless drill’s battery lasts a surprisingly long time to begin with. The quick charge makes life so easy. Plug it in and either take a break or move on to do something else and within an hour, you’re ready to use the Hychika cordless power drill again.
  • And it also comes with a very nice canvas bag to keep all the goodies in and keep track of them. If you always put them back in the bag, they won’t be hard to find when you need your power drill.


  I was very impressed with the rubber grip on the handle as well. I almost grips your hand as you grip it, so the tool slipping in your grip is unlikely. And it is so much more comfortable than gripping bare plastic. 


  I really can not say enough about how much I like the Hychika cordless power drill. I put it through the paces for the review in the video below and since then have used it on a regular basis. Not a problem yet and it’s actually a joy to use. I drilled pilot holes and ran screws in them, then ran some screws in without pilot holes. It did great. Though I will always recommend you drilling a pilot hole if possible just to keep the material from splitting. 


  I ran bolts and tightened bolts and nuts with it and, as mentioned before, drilled the holes for tiny hinges and drove the screws for those hinges in with the Hychika cordless drill. I adjusted the torque and the speed, and this drill did it without being too much. 


  The link to the cordless power drill is https://bit.ly/32pYgKt

Below is the video review of the Hychika cordless power drill that I recorded so you can see the drill work for yourself.


Redneck Know How Blog

HYCHIKA Cordless Electric Screwdriver Review
By Donald Matthews 19 Jun, 2022
Will the HYCHIKA cordless screwdriver help me get the screws screwed when my arthritis is acting up? Sometimes it's painful to keep twisting a manual screwdriver and hopefully this is the solution. Come see how things turned out.
Grass Trimmer Review
By Donald Matthews 15 Jun, 2022
I was asked by Hyper Echo to try out their 20 volt cordless string trimmer and edger and do a review on it it. I did and in this article I will let you know what I found out.
The best crappie catching tips you can get!
By Donald Matthews 03 Jun, 2022
Every fisherman has his or her own favorite techniques to catch this beloved fish. Why is crappie, (or pomoxis, if you want to get scientific), are so beloved? Well, they give one heck of a fight when caught. A 2 lb. crappie can put up a fight to rival a bass of larger size. So catching them is fun. There is also the taste factor. Fried crappie tastes great.
Let's fry up some crappie cakes!
By Donald Matthews 03 Jun, 2022
The weather is warm and folks are crappie fishing. Here’s a fried crappie cake recipe that I enjoy. You can eat them plain with some fried taters, or slide them in a bun with some tarter sauce.
SORAKO 800-3000SPM Jigsaw With Blades & Scale Ruler
By Donald Matthews 28 May, 2022
I was asked to review the .SORAKO 800-3000SPM Jigsaw And after the pleasant experience with the SORAKO chainsaw, I was happy to give their jigsaw a try. Come find out what the results were.
By Donald Matthews 11 Apr, 2022
I was given the opportunity by HYCHIKA to try out and review their SORAKO chainsaw. This blog describes what I think about the chainsaw. How well I like it as well as my experience in using it.
By Donald Matthews 11 Oct, 2021
Everybody seems to be in love with dovetails these days. Myself included. They look nice, feel nice, and they make the woodworker feel an overwhelming since of pride when he makes tight and even. Especially the hand cut dovetails. Dovetail joints can be produced with power tools. And there are dovetail jigs you can buy and make. It makes getting precise dovetails with no gaps a lot easier. But nothing feels more satisfying than finally getting hand cut dovetails tight and gap free. And for the record, I use the term, “gap free”, very loosely. I’d wager that even the best woodworker gets gaps in their dovetails no matter how hard they try. Maybe not as many as us new to middlin’ woodworkers, and certainly not as noticeable, but there are gaps in their dovetails. Nowadays, people use dovetails not only as a joint, but as decoration. A showpiece if you will to show off the craftsmanship of the woodworker. But the reality is that they were not originally meant to be pretty. They were utilized to hold pieces that were heavily used together. Such as drawers or other parts of furniture and other items that were constantly pulled or tugged on. In the example below, you can see how the angles of the dovetails will keep the joint from coming apart during the tugging of the drawer when opening it. This part of the joint is where the dovetail joint get’s it’s name. Often when used on boxes, the orientation of those angles are switched around, placing them on the front of the box as a decoration, and the pins of the joint is put on the side. Great for looks, not so great for function. Of course for most smaller boxes, the function of the dovetail really isn’t needed and using dovetails for looks is fine and an anesthetically pleasing way to show off craftsmanship. But let’s not give up on using the dovetail joint for utilitarian purposes when building boxes too quickly. They can be a great way to join a bottom to a box that will be holding heavier stuff, such as tool boxes. The angle of the dovetails can manage the stresses of carrying heavier items such as tools if you wish to maintain a *NO screws or nails* policy on your woodworking projects. Or you can use the dovetail joint along with screws for extra protection against the bottom dropping out. So the purpose of the dovetail is a lot more than to just make your woodworking look good. In fact, long ago, they were hidden. Simply a way to join parts and give them the strength to do what the item was meant to do, and be hidden when the drawer was closed. Using the dovetail joint for decoration is a modern thing. Which I have nothing against. I love to show off dovetails I’ve made nearly perfect. Well, in my eyes anyway. Roy Underhill and Paul Sellers would likely just look at them and grin, maybe chuckle at me being so proud of something so far from the skill level they have achieved.
Best super glue ever!
By Donald Matthews 10 Oct, 2021
My wonderful experience with Starbond Super glue is explained in this blog post. The absolute best CA glue I've used.
How I plugged the holes in my table top.
By Donald Matthews 20 Aug, 2020
An option for dealing with nail holes and voids in a table top made with pallet wood.
By Donald Matthews 14 Aug, 2020
Now it’s time to mark where the mortises for the dominoes will go. The dominoes will serve two purposes. 1) They will help the boards line up and stay lined up during glue up. 2) They will help add more surface area to make the glued up joint stronger. Once I get the edge of the boards marked for the mortises, I’ll make sure they they all line up. Then I’ll start creating the mortises that I marked. First by removing a large amount of the waste with a drill and a Forstner bit, and then follow behind with a chisel to clean up the mortise. Next was the process of gluing the boards together and creating the table top. This is conceptually easy. However, it being a large glue up, gets complicated in practice easily. So what I did was glue up two boards at a time. Letting those boards dry, then gluing those sections up until I finally finished with a full table top. This takes awhile longer than just gluing everything up at one time, but it’s far easier to get two boards to line up, and stay lined up, than five or six at the same time. And of course, there’s the window of time to get things lined up before the glue starts to set to consider. When you’re doing this alone, the glue’s set time sneaks up on you faster than you think. I didn’t have enough clamps long enough to do this glue up and lacked the funds to buy them. Nor could I afford to buy the materials to build pipe clamps. I did find a video in which Izzy Swan made some wedge clamps out of two by fours. And since I had the materials on hand to make them, those are what I made and used. Check out Izzy Swan’s video at this link. https://www.youtube.com/watch?v=wr6MkXy1nos
More Posts
Share by: