Blog Layout

HyperEcho Cordless Grass Trimmer and Edger Review

Donald Matthews • Jun 15, 2022

Hyper Echo Cordless String Trimmer and Edger I was asked by HyperEcho to try out their 20 volt cordless string trimmer and edger and do a review on it it. I did and in this article I will let you know what I found out.

Click to enlarge string trimmer picture.
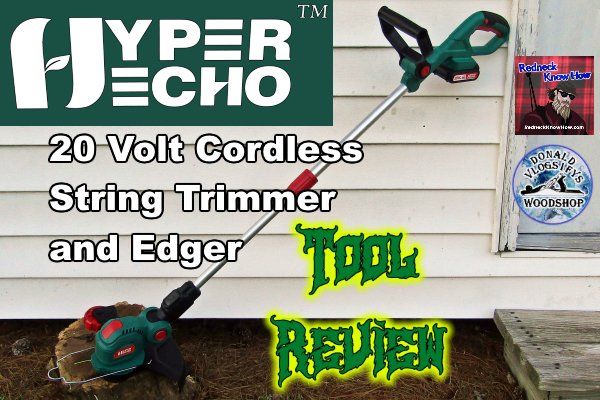
HyperEcho Cordless String Trimmer and Edger.
Click to enlarge.

First I’ll discuss some of the features of the cordless trimmer. It is, in fact, a 2 in 1 weed trimmer, It converts from a standard grass and weed trimmer to an edger with the simple press of a button and a twist. It gives a 10 inch cut radius. When the trimmer is fully assembled, it only weighs 4.6 pounds. So it’s lightweight and easy to hold. The telescopic handle makes it easy to adjust for your height and comfort. So the HyperEcho string trimmer is easy on the back. It features a “D” shaped auxiliary handle that has adjustable positioning for added comfort adjustment. The grass cutting string feeds from the spool automatically as needed. So, there’s no need for bumping or manual recoiling required. It comes with a 2.0Ah battery and a fast charger that charges in 75 minutes. There’s plenty of power to trim a medium yard on one charge.


HyperEcho Cordless String Trimmer and Edger

The battery came with a partial charge and I finished it up on the charger. Charging is easy and quick. Just slide the battery onto the charger and plug it in. The lights on the front of the charger let you know when it’s done charging. The red light is on while it’s still charging, and it’s fully charged when it switches to the green light.

There was a little bit of assembly to do when I opened the string trimmer. Nothing difficult, and all I really needed was a screwdriver with a philips head. I simply had to slide the flower guard on the head of the weed trimmer. Then attached the guard cover with the two screws that came with the tool. Then I attached the “D” handle by pushing the button in and snapping the handle in place. Then you can adjust the position of the “D” handle by pushing that same button and moving the hand into the position that makes operating the HyperEcho cordless string trimmer comfortable for you.

Click to enlarge string trimmer picture.
HyperEcho rechargable 20 volt battery comes with the string trimmer.
Click to enlarge.

First I took it right outside and tried the string trimmer around the wood shop. It worked great. It cut the taller grass well and I was ready to see what it did as far actually trimming and edging the grass. I don’t really have that much to try it on in my back yard, so I took the string trimmer out front to edge around the walkway and driveway. This is where I get a bit critical of the HyperEcho string trimmer. I converted it to use as an edger and placed the wheel on the concrete and began edging the walkway. It trimmed and edged fine.

But the design of the wheel seemed to want to jam and stick on the concrete. I checked to make sure it was spinning freely. It was. But the spacing of the grooves are so far apart that they want hinder it from turning when the wheel contacts the cement. Things would go a lot easier if those grooves where smaller and closer together. But the string trimmer is so light that you can hold the wheel up off the concrete and work around that issue.


Click to enlarge string trimmer picture.
Edging with the HyperEcho string trimmer.
Click to enlarge.

I continued to use it. Cutting the weeds that had grown up through the relief cracks that separate the sections of driveway and a few extra cracks that have appeared in the cement over the years. The HyperEcho grass trimmer cleared them away with no issue. I trimmed around our pitiful little shrubs and azaleas. The flower guard worked well at keeping me from getting to close and damaging them. I trimmed the grass and some poke weeds around our Japanese maple. It cut through the thick poke weed like it was nothing. Next I trimmed around the house. Again, it performed wonderfully. And the flower guard worked well at preventing me from damaging parts of the house by letting the string get too close. Yet still allowed me to achieve a close, well manicured cut.


I returned to the backyard, but I was not ready to quit using the HyperEcho Cordless String Trimmer / Edger yet. So I decided to knock down a few elephant ears which have spread like wildfire in the yard. Again, the tool performed wonderfully. My battery was still showing 3 bars. So I decided to cut my path to the woodshop with the trimmer. It did well and didn’t over tax my back. I honestly think I could have cut the whole yard with one charge.


My final opinion on the HyperEcho Cordless String Trimmer and Edger is that it’s a very good 20 volt battery operated weed trimmer. Even though I did find the wheel design for the edger to be a bit of a let down, the over-all light weight design of the string trimmer made it easy to work around that issue. And let’s face it, no tool of any kind is perfect, let alone a yard tool. It has enough power to cut through thicker weeds and grass, though you won’t be cutting down any small trees or saplings with it. And it’s not designed for that. But you know us rednecks gonna try. hehehehe...


Click to enlarge string trimmer picture.
Using the HyperEcho grass trimmer around the azalias.
Click to enlarge.
Click to enlarge string trimmer picture.
Poke salad don't stand a chance against this weed trimmer.
Click to enlarge.

The string feeds out nicely and automatically. I didn’t have to keep bumping the ground. And it rarely tangled up and backlashed on me. It only happened once to me and that was my fault when I tried to cut down one of those trees I mentioned up there. I have no doubt that if you have a small to medium yard, the HyperEcho will trim the whole yard on one charge. And if your mower is broke down, I’d say the trimmer would cut the whole yard in less than two charges. And the charging of the battery only takes 75 minutes, so that gives you a nice lunch break.

At the end of the day, this string trimmer is a good tool for light to medium yardwork. It’s lightweight and easy to hold. And adjustable to suit any height. I would recommend this tool. If you’d like more information about the HyperEcho Cordless String Trimmer and Edger click here. Or watch me put the string trimmer through it’s paces in the video below. Thank you for reading and have a lovely whatever you’re lovelyin’.

Click to enlarge string trimmer picture.
The Hyper Echo Cordless String Trimmer and Edger turns out to be a pretty good string trimmer for the money.
Click here to enlarge.


Hyper Echo Grass Trimmer Tool Review

Redneck Know How Blog

HYCHIKA Cordless Electric Screwdriver Review
By Donald Matthews 19 Jun, 2022
Will the HYCHIKA cordless screwdriver help me get the screws screwed when my arthritis is acting up? Sometimes it's painful to keep twisting a manual screwdriver and hopefully this is the solution. Come see how things turned out.
The best crappie catching tips you can get!
By Donald Matthews 03 Jun, 2022
Every fisherman has his or her own favorite techniques to catch this beloved fish. Why is crappie, (or pomoxis, if you want to get scientific), are so beloved? Well, they give one heck of a fight when caught. A 2 lb. crappie can put up a fight to rival a bass of larger size. So catching them is fun. There is also the taste factor. Fried crappie tastes great.
Let's fry up some crappie cakes!
By Donald Matthews 03 Jun, 2022
The weather is warm and folks are crappie fishing. Here’s a fried crappie cake recipe that I enjoy. You can eat them plain with some fried taters, or slide them in a bun with some tarter sauce.
SORAKO 800-3000SPM Jigsaw With Blades & Scale Ruler
By Donald Matthews 28 May, 2022
I was asked to review the .SORAKO 800-3000SPM Jigsaw And after the pleasant experience with the SORAKO chainsaw, I was happy to give their jigsaw a try. Come find out what the results were.
By Donald Matthews 11 Apr, 2022
I was given the opportunity by HYCHIKA to try out and review their SORAKO chainsaw. This blog describes what I think about the chainsaw. How well I like it as well as my experience in using it.
Hychika Cordless Drill Tool Review
By Donald Matthews 28 Mar, 2022
I was aske to review the Hychika cordless power drill and I did. I used it to do various things in my home and in my wood shop. This is what I think of it.
By Donald Matthews 11 Oct, 2021
Everybody seems to be in love with dovetails these days. Myself included. They look nice, feel nice, and they make the woodworker feel an overwhelming since of pride when he makes tight and even. Especially the hand cut dovetails. Dovetail joints can be produced with power tools. And there are dovetail jigs you can buy and make. It makes getting precise dovetails with no gaps a lot easier. But nothing feels more satisfying than finally getting hand cut dovetails tight and gap free. And for the record, I use the term, “gap free”, very loosely. I’d wager that even the best woodworker gets gaps in their dovetails no matter how hard they try. Maybe not as many as us new to middlin’ woodworkers, and certainly not as noticeable, but there are gaps in their dovetails. Nowadays, people use dovetails not only as a joint, but as decoration. A showpiece if you will to show off the craftsmanship of the woodworker. But the reality is that they were not originally meant to be pretty. They were utilized to hold pieces that were heavily used together. Such as drawers or other parts of furniture and other items that were constantly pulled or tugged on. In the example below, you can see how the angles of the dovetails will keep the joint from coming apart during the tugging of the drawer when opening it. This part of the joint is where the dovetail joint get’s it’s name. Often when used on boxes, the orientation of those angles are switched around, placing them on the front of the box as a decoration, and the pins of the joint is put on the side. Great for looks, not so great for function. Of course for most smaller boxes, the function of the dovetail really isn’t needed and using dovetails for looks is fine and an anesthetically pleasing way to show off craftsmanship. But let’s not give up on using the dovetail joint for utilitarian purposes when building boxes too quickly. They can be a great way to join a bottom to a box that will be holding heavier stuff, such as tool boxes. The angle of the dovetails can manage the stresses of carrying heavier items such as tools if you wish to maintain a *NO screws or nails* policy on your woodworking projects. Or you can use the dovetail joint along with screws for extra protection against the bottom dropping out. So the purpose of the dovetail is a lot more than to just make your woodworking look good. In fact, long ago, they were hidden. Simply a way to join parts and give them the strength to do what the item was meant to do, and be hidden when the drawer was closed. Using the dovetail joint for decoration is a modern thing. Which I have nothing against. I love to show off dovetails I’ve made nearly perfect. Well, in my eyes anyway. Roy Underhill and Paul Sellers would likely just look at them and grin, maybe chuckle at me being so proud of something so far from the skill level they have achieved.
Best super glue ever!
By Donald Matthews 10 Oct, 2021
My wonderful experience with Starbond Super glue is explained in this blog post. The absolute best CA glue I've used.
How I plugged the holes in my table top.
By Donald Matthews 20 Aug, 2020
An option for dealing with nail holes and voids in a table top made with pallet wood.
By Donald Matthews 14 Aug, 2020
Now it’s time to mark where the mortises for the dominoes will go. The dominoes will serve two purposes. 1) They will help the boards line up and stay lined up during glue up. 2) They will help add more surface area to make the glued up joint stronger. Once I get the edge of the boards marked for the mortises, I’ll make sure they they all line up. Then I’ll start creating the mortises that I marked. First by removing a large amount of the waste with a drill and a Forstner bit, and then follow behind with a chisel to clean up the mortise. Next was the process of gluing the boards together and creating the table top. This is conceptually easy. However, it being a large glue up, gets complicated in practice easily. So what I did was glue up two boards at a time. Letting those boards dry, then gluing those sections up until I finally finished with a full table top. This takes awhile longer than just gluing everything up at one time, but it’s far easier to get two boards to line up, and stay lined up, than five or six at the same time. And of course, there’s the window of time to get things lined up before the glue starts to set to consider. When you’re doing this alone, the glue’s set time sneaks up on you faster than you think. I didn’t have enough clamps long enough to do this glue up and lacked the funds to buy them. Nor could I afford to buy the materials to build pipe clamps. I did find a video in which Izzy Swan made some wedge clamps out of two by fours. And since I had the materials on hand to make them, those are what I made and used. Check out Izzy Swan’s video at this link. https://www.youtube.com/watch?v=wr6MkXy1nos
More Posts
Share by: