Pneumatic Wood Carving
January 14, 2016
First and foremost, you will defiantly need to wear eye protection when doing pneumatic wood carving. The bits for the pneumatic engraver are small and can break, and the speed at which the tool is spinning can throw the piece of the bit that breaks at a very high velocity. And that can cause some serious eye injuries. I also recommend a respirator or dust mask as a lot of dust is created by the wood carving process. Though I don’t use a dust mask in this video because it fogs up my eye protection and I made the personal choice not to wear dust protection.
The first step is to get your basic design onto the wood. I used a design I drew onto some notebook paper, then used carbon paper under that design and traced out the design onto the pieces I would be doing the pneumatic wood carving on. I then used one of the smaller straight carbide bits to trace around the basic pattern, cutting into the wood to get my design started.
After I got the tracing of the design done I switched to a smaller sized round end carbide bit to pull some of the wood away from where I traced. The videos tell what I do much better than I could ever explain. As I walk through everything I do step by step. So I invite you to watch my pneumatic wood carving in the Dovetail Box from Pallet Wood and Scraps series, starting here with part 3
which is posted below.
Pneumatic wood carving can be a very enjoyable and calming way to express yourself. I often lose track of time when I pick up the pneumatic engraver and begin wood carving, forgetting the world outside and enjoying what I’m doing.
Redneck Know How Blog

Every fisherman has his or her own favorite techniques to catch this beloved fish. Why is crappie, (or pomoxis, if you want to get scientific), are so beloved? Well, they give one heck of a fight when caught. A 2 lb. crappie can put up a fight to rival a bass of larger size. So catching them is fun. There is also the taste factor. Fried crappie tastes great.

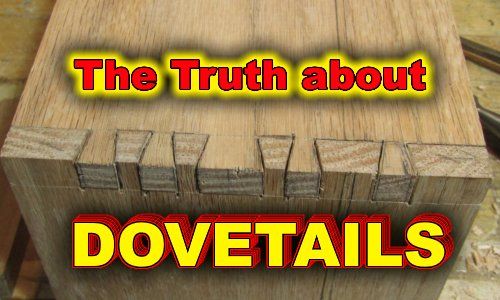
Everybody seems to be in love with dovetails these days. Myself included. They look nice, feel nice, and they make the woodworker feel an overwhelming since of pride when he makes tight and even. Especially the hand cut dovetails. Dovetail joints can be produced with power tools. And there are dovetail jigs you can buy and make. It makes getting precise dovetails with no gaps a lot easier. But nothing feels more satisfying than finally getting hand cut dovetails tight and gap free. And for the record, I use the term, “gap free”, very loosely. I’d wager that even the best woodworker gets gaps in their dovetails no matter how hard they try. Maybe not as many as us new to middlin’ woodworkers, and certainly not as noticeable, but there are gaps in their dovetails. Nowadays, people use dovetails not only as a joint, but as decoration. A showpiece if you will to show off the craftsmanship of the woodworker. But the reality is that they were not originally meant to be pretty. They were utilized to hold pieces that were heavily used together. Such as drawers or other parts of furniture and other items that were constantly pulled or tugged on. In the example below, you can see how the angles of the dovetails will keep the joint from coming apart during the tugging of the drawer when opening it. This part of the joint is where the dovetail joint get’s it’s name. Often when used on boxes, the orientation of those angles are switched around, placing them on the front of the box as a decoration, and the pins of the joint is put on the side. Great for looks, not so great for function. Of course for most smaller boxes, the function of the dovetail really isn’t needed and using dovetails for looks is fine and an anesthetically pleasing way to show off craftsmanship. But let’s not give up on using the dovetail joint for utilitarian purposes when building boxes too quickly. They can be a great way to join a bottom to a box that will be holding heavier stuff, such as tool boxes. The angle of the dovetails can manage the stresses of carrying heavier items such as tools if you wish to maintain a *NO screws or nails* policy on your woodworking projects. Or you can use the dovetail joint along with screws for extra protection against the bottom dropping out. So the purpose of the dovetail is a lot more than to just make your woodworking look good. In fact, long ago, they were hidden. Simply a way to join parts and give them the strength to do what the item was meant to do, and be hidden when the drawer was closed. Using the dovetail joint for decoration is a modern thing. Which I have nothing against. I love to show off dovetails I’ve made nearly perfect. Well, in my eyes anyway. Roy Underhill and Paul Sellers would likely just look at them and grin, maybe chuckle at me being so proud of something so far from the skill level they have achieved.


