How to Turn a Pen on a Shopsmith Mark 5
December 31, 2017
A couple years ago, I decided I wanted to turn pens. The only lathe available to me was a Shopsmith lathe. The principle and basic operation of pen turning is the same on a Shopsmith, but the mandrel used is a little different due to the way components are attached to the Shopsmith. This is how I do it.
The first part of this endeavor, assuming you have the turning gouges and skews, is finding the mandrel that fits the shopsmith. The only one I could find that really suited my needs was the “Universal Lathe Pen Mandrel Set: For 5/8 in. Shopsmith”. Just copy and paste that into a search engine and search, you’ll find a few places that you can order it from. There are mandrels that fit into the drill chuck component of the the shopsmith, but I found that to be an uncomfortable way to turn the pens.
Next, I recommend a mandrel saver. They are not too expensive and can be found at the same places you find the mandrel at. It really helps make your mandrel lat far longer, and prevent you from replacing several cup centers or live centers due to wear. Which I go into better detail on in the video below.
Next you’ll need a pen kit. You can turn any pen kit you wish on the shopsmith using this same mandrel, just keep in mind that different styles of pens require different sized bushings and drill bits for drilling the center hole to place the tube into. In this instance I’m turning a slimline simply because the universal pen mandrel for the shopsmith happens to come with the 7mm bushings and drill bit that you will need for turning the slimline pen.
You simply take one of the tubes out, line it up on the pen blank, measure and mark as explained in the video. Then just cut the pen blank according to the marks you made. Then with a straight edge laid corner to corner, mark a line. Where the lines meet is the center of your pen blank. It doesn’t have to be perfect center, but as close as you can get. If you happen to have a round blank, a center finder is your best option for getting as close to the center of your pen blank as you can.
I have built a jig for the drill press to help me hold the pen blank in place once I get it centered under the drill bit. You can hold it using a clamp and your hands, just make sure you don’t move your blank while drilling, but a simple jig like I use in the video makes life so much easier and risks of damaging the pen blank lessens greatly. I also use an ice pick to poke a hole in the center of the blank so the brad tip of the drill bit will have a good place to start. It just seems to help the bit from wandering off the center mark.
When drilling the center hole into your pen blank, drill a little then bring your bit back out. This helps clear the waste from the drill bit and out of the hole. Also, if you try to hog out the all all at once, your bit will tend to try and follow the grain of the wood or the weakest part of an acrylic blank. This will cause your hole to not be straight and give you problems when you try to glue in the pen tubes. Also, in some extremely hardwoods and especially acrylic pen blanks, The bit might start getting overly hot. Just stop and give it a few minutes to cool. And overheated drill bit will weaken, become dull, and bend.
Next comes gluing in the tubes. There are many choices in glue. Some use CA glue, I find that it loses it’s hold too easy though. Polyurethane glue such as Gorilla glue works well, but it requires all night to get a strong bond. I started using 5 minute epoxy most of the time. It gives a strong bond between the tube and the pen blank in just a few minutes. I run a cotton swap that was soaked in denatured alcohol; not a lot but enough to clean out the dust. While that is drying I run some sand paper over the tubes to rough them up. This helps the epoxy grip the tube better. Then I mix up the epoxy. I put some on the pen tube and spread it on the outside of the tube with the stick I used to mix it with. Then slide the tube into the hole of the pen blank. It helps to slide it in and out a couple of times to spread the epoxy, then slide it on in all the way. Wipe the excess off the ends of the blank and let it set up. I tend to give it an hour just to be sure the epoxy is well set.
After the epoxy has had time to dry, I set up the shopsmith with the sanding disc, placing the table right in front of the disc. Holding the pen blank with a squeeze clamp, I sand the ends to the tube as I show in the second video below. Also in this video I show how I turn the slimline pen. I just turn a basic slimline pen shape in the video, but the style and design of the pen is only limited to your imagination. This second video also shows how I put the pen together.
Redneck Know How Blog

Will the HYCHIKA cordless screwdriver help me get the screws screwed when my arthritis is acting up? Sometimes it's painful to keep twisting a manual screwdriver and hopefully this is the solution. Come see how things turned out.

I was asked by Hyper Echo to try out their 20 volt cordless string trimmer and edger and do a review on it it. I did and in this article I will let you know what I found out.

Every fisherman has his or her own favorite techniques to catch this beloved fish. Why is crappie, (or pomoxis, if you want to get scientific), are so beloved? Well, they give one heck of a fight when caught. A 2 lb. crappie can put up a fight to rival a bass of larger size. So catching them is fun. There is also the taste factor. Fried crappie tastes great.

The weather is warm and folks are crappie fishing. Here’s a fried crappie cake recipe that I enjoy. You can eat them plain with some fried taters, or slide them in a bun with some tarter sauce.
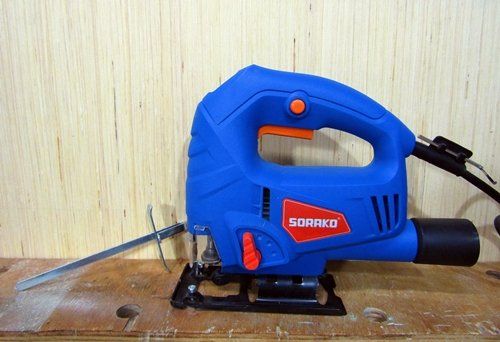
I was asked to review the .SORAKO 800-3000SPM Jigsaw And after the pleasant experience with the SORAKO chainsaw, I was happy to give their jigsaw a try. Come find out what the results were.
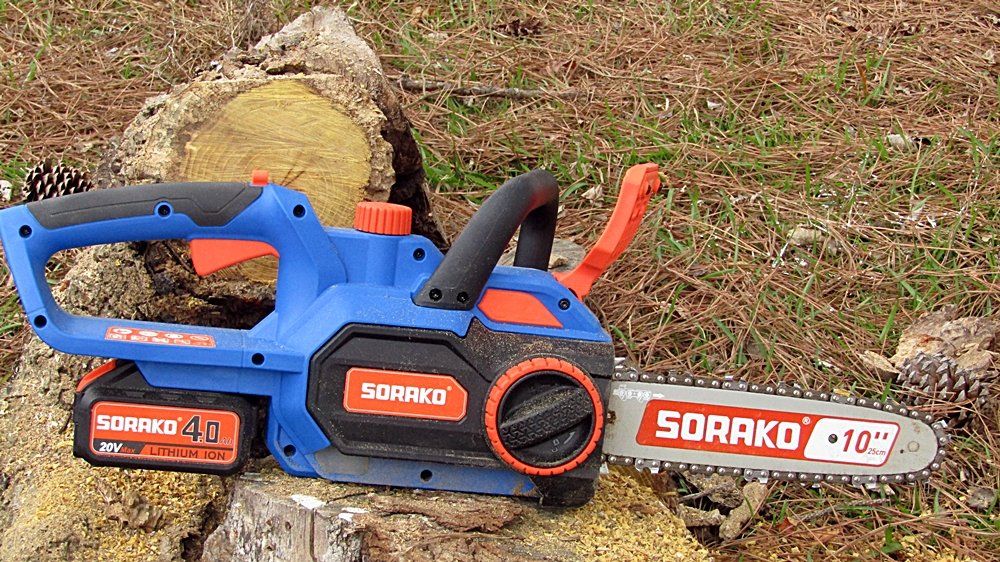
I was given the opportunity by HYCHIKA to try out and review their SORAKO chainsaw. This blog describes what I think about the chainsaw. How well I like it as well as my experience in using it.

I was aske to review the Hychika cordless power drill and I did. I used it to do various things in my home and in my wood shop. This is what I think of it.

Everybody seems to be in love with dovetails these days. Myself included. They look nice, feel nice, and they make the woodworker feel an overwhelming since of pride when he makes tight and even. Especially the hand cut dovetails. Dovetail joints can be produced with power tools. And there are dovetail jigs you can buy and make. It makes getting precise dovetails with no gaps a lot easier. But nothing feels more satisfying than finally getting hand cut dovetails tight and gap free. And for the record, I use the term, “gap free”, very loosely. I’d wager that even the best woodworker gets gaps in their dovetails no matter how hard they try. Maybe not as many as us new to middlin’ woodworkers, and certainly not as noticeable, but there are gaps in their dovetails. Nowadays, people use dovetails not only as a joint, but as decoration. A showpiece if you will to show off the craftsmanship of the woodworker. But the reality is that they were not originally meant to be pretty. They were utilized to hold pieces that were heavily used together. Such as drawers or other parts of furniture and other items that were constantly pulled or tugged on. In the example below, you can see how the angles of the dovetails will keep the joint from coming apart during the tugging of the drawer when opening it. This part of the joint is where the dovetail joint get’s it’s name. Often when used on boxes, the orientation of those angles are switched around, placing them on the front of the box as a decoration, and the pins of the joint is put on the side. Great for looks, not so great for function. Of course for most smaller boxes, the function of the dovetail really isn’t needed and using dovetails for looks is fine and an anesthetically pleasing way to show off craftsmanship. But let’s not give up on using the dovetail joint for utilitarian purposes when building boxes too quickly. They can be a great way to join a bottom to a box that will be holding heavier stuff, such as tool boxes. The angle of the dovetails can manage the stresses of carrying heavier items such as tools if you wish to maintain a *NO screws or nails* policy on your woodworking projects. Or you can use the dovetail joint along with screws for extra protection against the bottom dropping out. So the purpose of the dovetail is a lot more than to just make your woodworking look good. In fact, long ago, they were hidden. Simply a way to join parts and give them the strength to do what the item was meant to do, and be hidden when the drawer was closed. Using the dovetail joint for decoration is a modern thing. Which I have nothing against. I love to show off dovetails I’ve made nearly perfect. Well, in my eyes anyway. Roy Underhill and Paul Sellers would likely just look at them and grin, maybe chuckle at me being so proud of something so far from the skill level they have achieved.
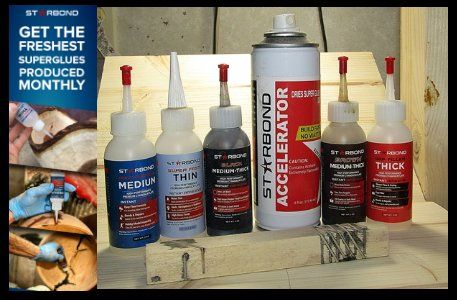
My wonderful experience with Starbond Super glue is explained in this blog post. The absolute best CA glue I've used.

An option for dealing with nail holes and voids in a table top made with pallet wood.